 |
| The Steer Skull |
Richard Clifford asked me to craft a steer skull for the set dressing for his set design of
You Can't Take It With You. I have never had the opportunity to work on that show, and didn't have an assignment on our production of it. I am at that point in my career where I probably won't have another opportunity to work on this show, and Richard knew that. I think that's why he asked me to build this prop. Plus, skull.
Step 1: Research
I did a quick search of longhorn cattle skulls online. I found images of skulls and printed them off. I also searched for dimensions of longhorn skulls and found that the average longhorn skull is 49 cm long by 21 cm wide by 26 cm high. I don't work in metric so I converted the measurements to imperial rule. The average skull is 19.25 inches long by 8.25 inches wide by 10.25 inches in height. The 10.25 inches included the bottom jaw which I was not going to include in my skull. I adjusted the height to reflect the upper portion of the skull without the bottom jaw.
Time: 30 minutes
 |
| A couple of research photos with layout lines |
Step 2: Layout
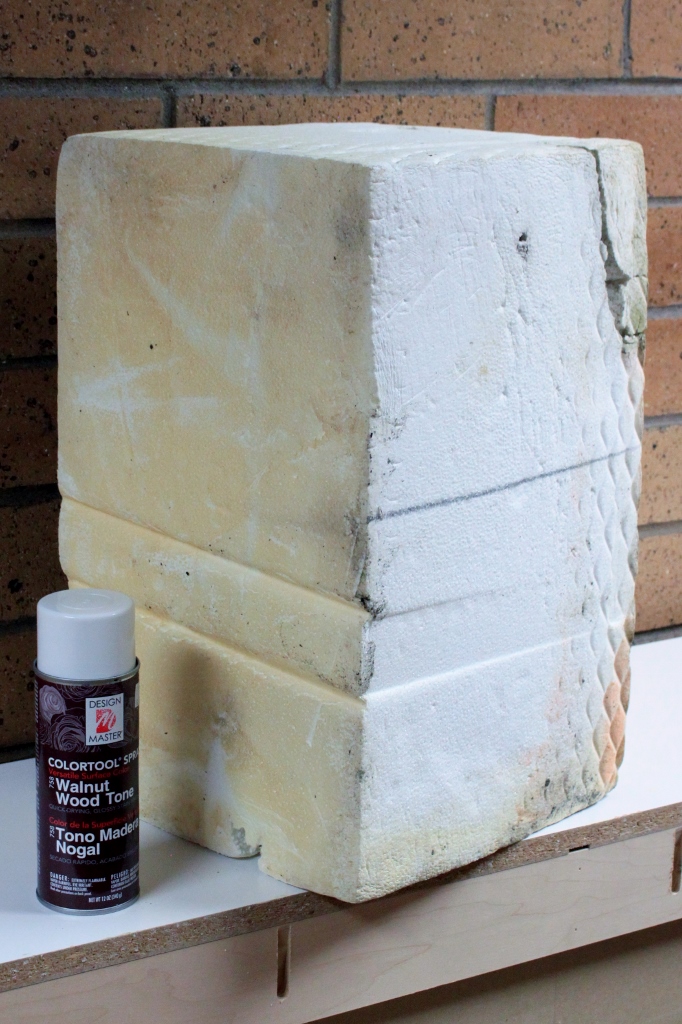
I acquired a block of polystyrene bead foam from the local farm store. It was a block of foam that had been used in a freight truck to keep loads from shifting. It was roughly 19" X 12" X 12". I took it to the bandsaw and set the fence for 4" and cut the block of foam to the appropriate size.
Then I drew layout lines on one of the images and then scaled and transferred those layout lines to the block of foam. Once I had the registration lines in place, I then cartooned out the top of the skull and the side of the skull on the foam block.
Time: 30 minutes
 |
| Foam block. Spray can in image to establish scale |
 |
| Cutting the foam block to size |
 |
| Sized |
 |
| Layout lines scaled from the layout lines on the image |
 |
| The cartoon of the top of the skull |
 |
| The cartoon of the side of the skull |
Step 3: Cutting the Blank
I first cut the top of the steer skull on the band saw, being careful to cut each side in a single pass. As I cut the sides, I saved the cast off pieces. When the two top cuts were completed, I reassembled the block of foam and taped it back together. This was done to facilitate cutting the side of the skull.
The results of this cutting technique was a compound shape cut on the bandsaw that formed the blank that was now ready to be carved and detailed.
Time: 15 minutes
 |
| Cutting the top of the steer skull |
 |
| 2nd cut on the top of the skull |
 |
| Sides come off in whole pieces |
 |
| Reassembling of the foam block with blue painters tape |
 |
| Cutting the side of the skull |
 |
| 2nd cut on the side |
 |
| The blank just before the reveal |
 |
| The skull blank revealed |
 |
| And on it's side |
Step 4: Carving
I roughed out the blank with two different sizes of surform tools. Then I cut the deepest part of the relief, the eye sockets and the space in the skull immediately behind the eye sockets with a Dremel Tool. I also used the Dremel to put the finishing detail on the rest of the skull.
I carved the teeth with an old soldering iron. I used the entire length of the soldering iron for the teeth, rather than just the tip. I wanted to use the soldering iron because the heat of the iron would cause a smooth skin on the teeth of the cow skull and would help give a better final finish.
When the carving was done, I cleaned it up with an orbital sander.
Time: 45 minutes
 |
| Surform tool |
 |
| Smaller surform tool for finer work. Notice the research material in the foreground |
 |
| Rough carving |
 |
| From the side |
 |
| Detail with the Dremel |
 |
| Eye socket in |
 |
| Soldering iron for detail |
 |
| Using the length of the soldering iron |
 |
| The teeth |
 |
| Bottom of the teeth |
 |
| Orbital sander |
 |
| Smoothed over |
 |
| Top view |
 |
| Other side |
Step 5: Carving the Horns
I have used pool noodles for crafting for many years. They come in various sizes and shapes. Pool noodles are flexible, but hold their shape very well. They are also cheap. The downside of pool noodles is that they are made of polyethylene. It is very difficult to find a paint product that will stick to it.
From the beginning, pool noodles seemed to be the best solution for the horns in the longhorn skull. I bought a couple of pool noodles from the dollar store. I matched the hole in the pool noodle to a 7/8 inch dowel. It was a snug fit. Pool noodles usually are about 4' long, and I knew I would not be using the entire length, but at this point I was unsure how long the finished horns would be, so I decided to work on the pointy end first and cut them to length when I had more information.
I marked an arbitrary taper on the dowel and then continued the taper on the pool noodle. When I had what I considered to be the right taper, I headed to the shop and the belt/disc sander.
I sanded the cone shaped taper into the dowels first, then I cut the dowels to be about six inches in length. Then I cut a small dowel about four inches long and inserted it into the end of the pool noodles. I did this to provide a rigid core to sand the pool noodle around.
When I put the dowels and the pool noodles together, there was a small ridge between the pool noodle and the dowel, but I considered that would be okay because even at this stage I had decided to even that out with a coating of Fiberglas.
Time: 15 minutes
 |
| Arbitrary taper marked on dowel and pool noodle |
 |
| Shaping the dowel. Notice the safety glasses. |
 |
| Measuring for a cut |
 |
| Completing the cut |
 |
| The temporary dowel |
 |
| Inserted |
 |
| Shaping the pool noodle |
 |
| The ridge. |
 |
| Temporary dowel removed and the permanent dowel fitted. |
Step 6: Creating the Stand
I decided to create a wooden base for the steer skull that would be integrated into the skull itself and would provide a sturdy support for the horns. I wanted all the weight of the horns to be carried on the stand, rather than the polystyrene skull. The block of foam I had was medium density polystyrene and therefore not particularly robust.
I found a couple of scraps of 1X3 and began eyeballing my measurements. I did this by comparing them to the carved foam skull. When I was satisfied that I had it right, I cut the boards to length and shaped the top board on the belt sander. The top board would be the one that would fit just under the top portion of the skull.
When the pieces were finished, I screwed them together. Finally, I cut a 14" section of the dowel for the support for the horns.
Time: 15 minutes
 |
| Eyeballing the measurement |
 |
| Marking |
 |
| Marking the curve |
 |
| The curve |
 |
| Shaping the 1X3 |
 |
| verifying |
 |
| Setting on the base |
 |
| No technicians were harmed in this process |
 |
| The stand |
 |
| Cutting the dowel to 14 inches |
Step 7: Attaching the Horns
I took a 7/8" spade bit and drilled a hole in the skull where the intersection of the horns would be. I had to drill it from both sides because my spade bit wasn't long enough to bore the hole all the way through.
I then marked and cut the spot with a Dremel where the stand would intersect with the skull. When that was complete, I placed it in the channel and marked where the dowel would go. Next I drilled the 7/8" hole in the wooden stand.
Then came the moment of truth. Would everything fit? Since this part was all eyeballed, there was a chance it wouldn't work. luckily, though it did. It all fit together nicely.
Time: 15 minutes
 |
| Drilling the hole |
 |
| Marking the spot for the stand to rest inside the skull |
 |
| Made a decision then changed it |
 |
| Cutting it out with the Dremel |
 |
| Final fitting |
 |
| Marking the stand |
 |
| Drilling the stand |
 |
| Moment of truth. It fits! |
Step 8: Final Horn Assembly
I decided early on to use coat hanger wire to shape the horns. I like to craft with coat hangers because they are cheap, they are everywhere, and they are made of stiff wire. I figured I could use coat hangers to help keep the shape of the horns.
I decided each horn would need four coat hangers. I selected eight hangers and began cutting the hook off, then straightening them and finally cutting them all to approximately the same length.
Next I made drilling marks on the dowels at the skull and at the end of each horn. Then I put a piece of tape as a marker on my drill bit as a depth gauge.
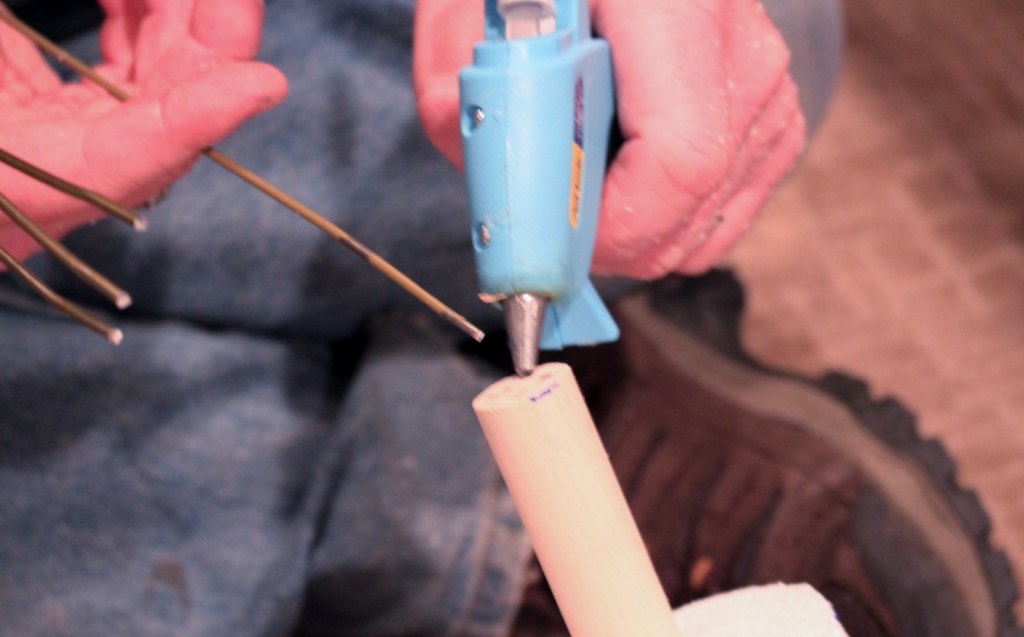
After the holes were drilled, I began the wire and dowel assembly by using Gorilla Glue. Then I realized I was too impatient to use Gorilla Glue and abandoned it for hot glue. That being said, I like Gorilla Glue and I use it often. I was just in a hurry on this project.
When the wires were attached, I eyeball measured the pool noodles and cut them to length with a bread knife. Then I sleeved the pool noodles over the wire and dowel assembly.
Finally, I drilled a pilot hole in the frame and the main dowel and then drove a drywall screw in to hold the dowel in place side to side and to keep it from rotating.
Time: 45 minutes
 |
| Wire coathangers |
 |
| Cutting off the hook |
 |
| Hookless |
 |
| Straightening |
 |
| Raw material |
 |
| Cutting to length |
 |
| Depth gauge |
 |
| Marking |
 |
| Drilling |
 |
| Gorilla Glue |
 |
| Nah, I'm going to hot glue that. Are my hands really that pink? |
 |
| Wire and dowel assembly |
 |
| Marking the pool noodle |
 |
| Cutting the pool noodle with a bread knife |
 |
| Assembly |
 |
| Very large steer horns |
 |
| Securing the dowel |
Step 9: Adjustments and Mastic
Richard had asked for the skull to be about 3' wide. At this point the skull was closer to seven feet wide. I knew I'd lose some of the width by bending the horns, but I also knew I couldn't bend them enough to make them look good and get close to the measurement he was asking for.
I contacted him and suggested the horns would probably be wider than 3'. He said the wall they were going on was about five and a half feet wide. I settled on about four and a half feet wide for the finished width.
Then I disassembled the horn rig and cut about a foot off of each wire and re-glued them. In order to do that I had to clean off the original hot glue, which was gumming up the holes.
I measured the pool noodles again and re-cut them. Then I sleeved them over the dowel and wire assembly one more time. The new width was far more reasonable. Then I bent the wires inside the pool noodles and formed the horns as symmetrically as I could.
When I was satisfied with the bend of the horns I applied
Rosco Flexcoat as a mastic. I needed to use mastic on this project because I needed a barrier between the foam and the fiberglas resin. Fiberglas resin will eat polystyrene foam.
Time: 30 minutes
 |
| Shortened horns |
 |
| Final bend and applying Rosco Flexcoat |
 |
| Mastic finished with a can of Rosco Flexcoat as a shameless plug |
Step 10: Fiberglas
I had never used fiberglas before this project. I had used fiberglas resin, but had never used the actual glass. I found two different types of fiberglas mat, one that was a woven fabric and the other that resembled Chaos Cloth from Rosebrand. I chose the Chaos Cloth lookalike. I figured it would conform to compound shapes better.
I had a friend there who walked me through the basics of fiberglassing. First I cut the mat into smaller more manageable pieces. Then I used
Super 77 spray adhesive to attach the glass mat onto the steer skull and the horns. I was especially careful to make sure that the pieces that wrapped around the top of the skull spanned the attachment joint between the skull and the horns.
When I had the skull all wrapped in glass matting, I began mixing and applying the fiberglas resin. I used a silicon basting brush to apply the resin. I learned that tapping the resin in place was more effective than trying to brush the resin in place. When you brush it, the mat tries to move around with the bristles. The next time I use fiberglas, I will find a way to attach the glass mat a little more securely. It was a little frustrating when it moved around and I had to do considerable cleanup work with it after it cured. Once I had all the resin on the skull, I went home. There was nothing I could do on it until the resin cured.
Time: 1 hour
 |
| Cutting the Chaos Cloth lookalike |
 |
| 3M Super 77 |
 |
| Glassed |
 |
| Closeup |
 |
| Adding resin |
 |
| The fiberglassed skull |
Step 11: Cleanup and Paint Prep
The fiberglas did everything I hoped it would. It created a hard shell on the skull and it secured the pool noodle horns in place. Prior to the fiberglas, the horns still had a tendency to flex and bounce. The fiberglas fixed that.
There were downsides to the fiberglassing as well, though. Since it was my first time, and I had been in a bit of a hurry, there were places where the glass mat hadn't laid down very well. There were also places, especially around the eye sockets where the ends of the glass mat hadn't been covered with resin. Those areas needed to be trimmed. For this I used my Dremel Tool with an aluminum oxide grinding bit.
Since I was grinding fiberglas and resin, I wore safety glasses, a particle mask and gloves and I worked in the fume hood.
When the grinding was finished, I used a
tack rag, which is essentially a piece of cheesecloth with sticky resin infused. Tack rags help to remove dust from a piece in preparation for paint.
I also painted an ivory color inside the eye sockets and a few other places where I felt the polystyrene was unprotected. I did this because my intent was to spray paint the skull. Polystyrene foam melts under the influence of the solvents in most spray paints.
While that was drying, I changed the bits on my Dremel Tool to a small diamond point bit, and carved the bone plates in the surface of the skull.
Time: 45 minutes
 |
| Grinding the rough stuff with the Dremel |
 |
| Closeup of eye socket |
 |
| Tack rag |
 |
| Painting inside the nasals and the eyes |
 |
| Cutting the bone plates into the skull |
 |
| Fabrication complet |
Step 12: The Paint Job
I am a big fan of
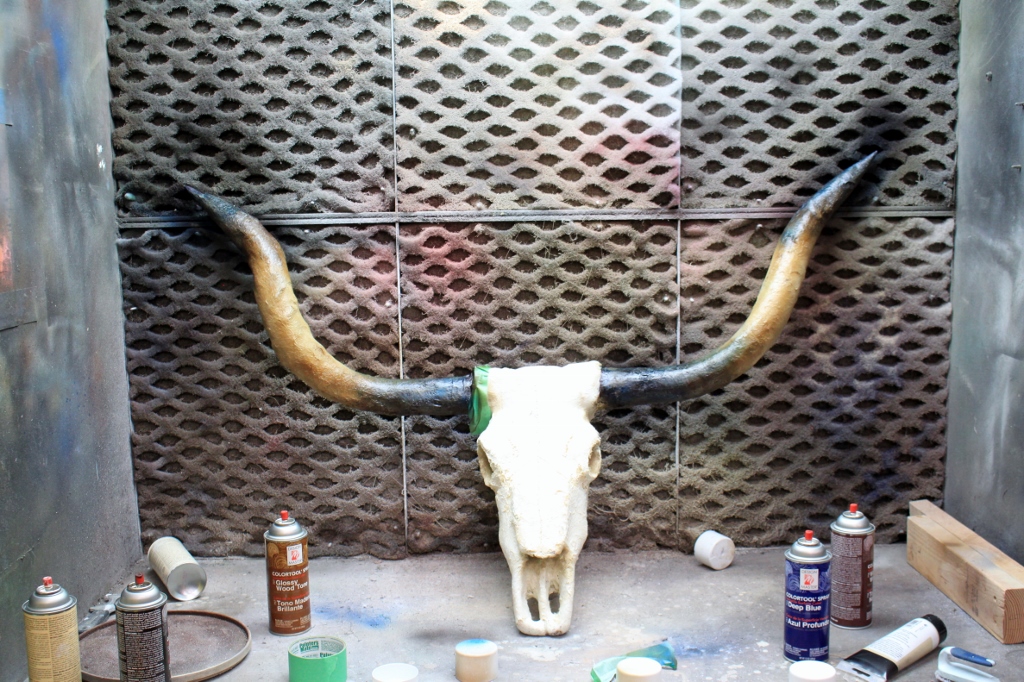
Design Master Color Tool in prop building. I used Ivory for the base of the skull and Almond for the base of the horns. Then I applied green frog tape to mask the skull from the horn paint job.
The horns were painted with a combination of Glossy Wood Tone, Walnut Wood Tone and Chocolate. I wanted the horns to be a little variegated as they were in the research I had found, so I started with the lightest color and worked to the darker colors. When I got to the Chocolate, I used a potato scrubbing brush and dragged it through the wet paint.
At the end, I added Deep Blue in the darkest parts of the horns for depth and richness.
Then I went to old fashioned brush paint for a little aging on the skull itself. I used a
Rosco Off Broadway, Raw Umber wash and wiped and daubed it away so the paint would settle into the deepest recesses of the bone plate joints in the skull.
For the last step, I painted the teeth of the skull with white nail enamel.
And then I turned it over to the Properties Department to be hung on the set.
Time: 30 minutes.
Total Time: 6 hours and 30 minutes
 |
| Design Master Color Tool base coat |
 |
| Basing the horns a little darker |
 |
| Skull with basecoat |
 |
| Frog Tape |
 |
| Glossy Wood Tone and Walnut Wood Tone applied |
 |
| Spray and drag technique for both the Chocolate and the Dark Blue |
 |
| Horns complete |
 |
| Rosco Raw Umber wash |
 |
| Applying |
 |
| Daubing off |
 |
| Nail enamel |
 |
| Goes on the teeth |
 |
| I turned it over to the prop department looking like this |
 |
| And this is how they displayed it. |


No comments:
Post a Comment